Looking for the best way to clean your Bunn coffee maker? Proper maintenance of your coffee maker ensures a fresh brew and extends the lifespan of your appliance. Cleaning your Bunn coffee maker is essential to remove coffee oils and residue that can affect the taste and performance of your machine. In this guide, we’ll walk you through a step-by-step process on how to clean your Bunn coffee maker effectively. Whether you’re dealing with stubborn stains or simply performing routine maintenance, our tips will help you keep your coffee maker in top shape. Discover the best techniques and products for maintaining a clean Bunn coffee maker and enjoy your coffee as it’s meant to be—fresh and flavorful. Follow these expert recommendations to keep your machine running smoothly and enhance your coffee experience.
Turn Off and unplug
Turning off and unplugging appliances is crucial for safety and energy efficiency. Always ensure devices are powered down and disconnected from the electrical source before cleaning, performing maintenance, or storing them. This practice prevents accidental shocks, reduces fire hazards, and saves energy. For electronic devices, turning off the power and unplugging them also helps prolong their lifespan by preventing potential damage from electrical surges. By making it a habit to turn off and unplug your appliances when not in use, you contribute to a safer environment and lower energy bills. Prioritize this simple yet effective measure in your daily routine for enhanced safety and efficiency.
Materials needed
To effectively clean your coffee maker, gather the essential materials: vinegar, water, a soft cloth, and a brush. Vinegar and water form a powerful cleaning solution to remove mineral deposits and residue. Combine equal parts of vinegar and water, and use this mixture to clean the internal components of your coffee maker. A soft cloth is ideal for wiping down exterior surfaces, ensuring a streak-free finish. A brush helps to reach and clean hard-to-access areas, such as the filter basket and drip tray, removing stubborn coffee grounds and buildup. Using these materials will ensure a thorough and efficient cleaning process, enhancing the performance and longevity of your coffee maker. Regular maintenance with these tools keeps your coffee maker in top condition and ensures a consistently great brew.
Remove all removable parts
Removing all removable parts from your appliance is key to effective cleaning and maintenance. This simple step ensures a thorough clean, preventing buildup of residue and grime that can affect performance. Start by referring to the user manual to identify which components can be detached. Carefully remove these parts and clean them separately according to the manufacturer’s instructions. This process helps maintain the appliance’s efficiency and longevity. Regularly removing and cleaning these parts not only enhances the appliance’s performance but also prevents potential malfunctions. Incorporate this practice into your maintenance routine to keep your appliance in optimal condition and extend its lifespan.
Clean the carafe and lid
Cleaning the carafe and lid of your coffee maker is essential for maintaining optimal flavor and hygiene. Over time, coffee oils and residues can accumulate, affecting the taste of your brew. To clean these components, first, ensure they are cool and safely removed from the machine. Wash the carafe and lid with warm, soapy water using a soft sponge or brush to avoid scratches. Rinse thoroughly and dry with a clean towel to prevent water spots. For a deeper clean, you can use a mixture of vinegar and water to eliminate stubborn stains and odors. Regularly cleaning the carafe and lid will enhance the taste of your coffee and ensure a consistently fresh brew. Incorporate this simple routine into your maintenance practices to keep your clean Bunn coffee maker with vinegar in top condition.
Clean the drip tray and filter basket
Cleaning the drip tray and filter basket of your coffee maker is crucial for maintaining its performance and ensuring a clean brew. Over time, coffee residues and spills can accumulate in these areas, potentially affecting the taste and function of your machine. To clean the drip tray and filter basket, first, ensure they are cool and safely removed from the coffee maker. Wash them with warm, soapy water, using a soft sponge or brush to remove any coffee grounds and stains. Rinse thoroughly and dry with a clean towel. For deeper cleaning, you can use a mixture of vinegar and water to tackle stubborn residues. Regular cleaning of these components helps prevent buildup, prolongs the lifespan of your coffee maker, and ensures a consistently great cup of coffee.
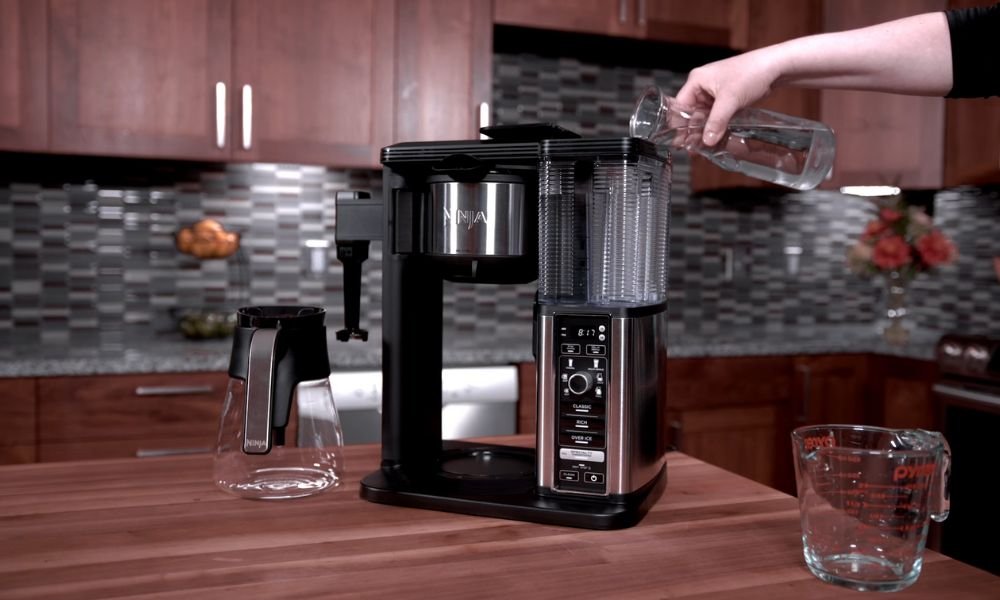
Fill the reservoir with cleaning solution
Filling the reservoir with a cleaning solution is a key step in maintaining your coffee maker’s performance. Start by preparing a cleaning solution, typically a mix of equal parts water and vinegar. Pour this mixture into the reservoir, ensuring it fills to the appropriate level as indicated by the manufacturer. This solution helps to break down and remove mineral deposits and coffee residue from the internal components of the machine. Once filled, run a brewing cycle without coffee grounds to allow the solution to circulate through the system. This process cleans the internal parts and improves the machine’s efficiency. After completing the cycle, rinse the reservoir thoroughly with fresh water to remove any remaining cleaning solution. Regularly using this method keeps your coffee maker functioning optimally and extends its lifespan.
Rinse the reservoir
Rinsing the reservoir of your coffee maker is crucial for ensuring a clean and fresh brew. After using a cleaning solution, such as a mix of water and vinegar, it’s important to thoroughly rinse the reservoir. Start by emptying any remaining cleaning solution from the reservoir. Then, fill it with fresh water, ensuring it reaches the same level as before. Swirl the water around to remove any residual cleaning solution or debris. Empty the reservoir and repeat the process if necessary until the water runs clear. This step removes any lingering cleaning agents and ensures that no flavors or chemicals affect your next cup of coffee. Regularly rinsing the reservoir maintains the quality of your brew and keeps your coffee maker in optimal condition.
Run a brewing cycle
Running a brewing cycle is essential for cleaning and maintaining your coffee maker. After filling the reservoir with a cleaning solution or freshwater, start the brewing cycle without any coffee grounds. This allows the solution to pass through the internal components, removing mineral deposits and residue that can affect performance and taste. Ensure you run the full cycle to thoroughly clean the machine. Once the cycle is complete, discard the solution and repeat the process with fresh water to rinse out any remaining cleaning agents. This step ensures that your coffee maker is free of residues and ready for use. Regularly running a brewing cycle with a cleaning solution helps maintain the machine’s efficiency and prolongs its lifespan.
Discard the solution and rinse
Discarding the cleaning solution and rinsing your coffee maker is crucial for maintaining optimal performance. After running a brewing cycle with the cleaning solution, carefully empty the reservoir to remove any remaining liquid. Rinse the reservoir thoroughly with fresh water to remove any residual cleaning agents. Fill the reservoir with freshwater and run another brewing cycle to ensure all traces of the cleaning solution are flushed out. This step prevents any lingering chemicals from affecting the taste of your coffee. By discarding the solution and performing a thorough rinse, you ensure that your coffee maker is clean, safe to use, and ready to brew your next cup. Regularly following this process helps maintain your machine’s efficiency and extends its lifespan.
Run several rinsing cycles
Running several rinsing cycles is vital for ensuring your coffee maker is free from any cleaning solution residues. After using a cleaning solution, it’s essential to thoroughly rinse the machine to avoid any residual chemicals affecting the taste of your coffee. Start by emptying the reservoir of the cleaning solution and refill it with fresh water. Run a brewing cycle, then discard the water. Repeat this process 2-3 times with clean water until the water runs clear and no traces of the cleaning solution are left. This thorough rinsing removes any lingering residues and ensures your coffee maker is clean and ready for use. Regularly performing these rinsing cycles helps maintain the quality of your coffee and prolongs the life of your appliance.
Wipe down the exterior
Wiping down the exterior of your coffee maker is an essential step in maintaining its overall cleanliness and appearance. Use a soft, damp cloth to gently clean the exterior surfaces, removing any spills, coffee stains, or dust. Avoid using abrasive materials or harsh chemicals that can damage the finish. For stubborn spots, a mild detergent can be applied to the cloth. Make sure to dry the surface with a clean, dry cloth to prevent water spots and streaks. Regularly wiping down the exterior not only keeps your coffee maker looking polished but also helps maintain its functionality by preventing buildup that can affect performance. Incorporate this simple cleaning task into your routine to ensure your coffee maker remains in excellent condition and continues to deliver great-tasting coffee.
Reassemble the coffee maker
Reassembling your coffee maker is the final step in maintaining its functionality after cleaning. Begin by ensuring all components are completely dry before reassembly. Carefully reattach the filter basket, drip tray, and any other removable parts you took off. Align each piece properly and ensure they are securely in place. If your coffee maker has a carafe, position it back in its designated slot. Double-check that all parts are correctly assembled to avoid leaks or malfunctions. Reassembling your coffee maker correctly ensures it operates smoothly and effectively. Regular maintenance and proper reassembly help extend the lifespan of your appliance and ensure a consistently great brewing experience. By following these steps, your coffee maker will be ready for its next use, performing at its best.
Conclusion
Learning how to clean a Bunn coffee maker is essential for maintaining optimal performance and ensuring great-tasting coffee. Regular cleaning helps to prevent the buildup of mineral deposits and coffee residue, which can affect the flavor and efficiency of your machine. Start by unplugging the coffee maker and emptying any remaining water. Use a mixture of white vinegar and water to clean the reservoir and brew basket, then run a few cycles of clean water to rinse thoroughly. Regular maintenance, including descaling and wiping down the exterior, will keep your Bunn coffee maker running smoothly. By following these simple steps, you ensure that every cup of coffee is as fresh and delicious as the last.